Fixing a Leaking Sink: A Step-by-Step Guide
A leaking sink can cause water damage and waste up to 20 gallons daily. First, identify the leak source by inspecting the P-trap, faucet, drain seal, and supply lines. For P-trap leaks, tighten slip nuts or replace worn washers. For faucet leaks, replace O-rings or cartridges. For drain leaks, reseal with plumber's putty. Turn off water supply before attempting repairs and use proper tools to avoid damage.
Key Takeaways
- Identify the specific leak source before attempting repairs
- Turn off water supply before working on any plumbing components
- Tighten loose connections with appropriate tools—hand-tight for compression fittings
- Replace worn washers, O-rings, or gaskets causing persistent leaks
- Use plumber's putty or silicone sealant for drain seal repairs
- Regularly inspect sink components monthly to catch leaks early
- Know when to call a professional for complex or recurring leaks
Understanding Where Your Sink is Leaking
Common Leak Locations
Faucet Leaks These manifest as pools of water at the base of your faucet when it's turned on, or as drips underneath the sink coming from the faucet assembly. Worn O-rings, damaged cartridges, or failed washers typically cause faucet leaks. Look for: Water pooling around the faucet base on top of the sink, or drips coming from the faucet assembly underneath. Drain Pipe Leaks (P-Trap) The P-trap is the curved pipe under your sink that prevents sewer gases from entering your home. Leaks here usually result from loose slip nuts, worn washers, or cracks in the pipe itself. Look for: Water puddles in the cabinet under the sink, wet stains on the pipe, or visible drips from pipe connections. Drain Seal Leaks The seal around your sink drain can degrade over time, allowing water to seep between the sink basin and the drain assembly. If your sink can't hold water without slowly draining, this is your problem. Look for: Water escaping around the drain opening, inability to hold water in the basin, or moisture on the underside of the sink around the drain. Supply Line Leaks The flexible hoses connecting your sink to the hot and cold water supply can develop leaks from worn connections, damaged washers, or degraded hoses. Look for: Water spraying or dripping from the flexible hoses, moisture at connection points, or puddles near the shut-off valves.The Leak Detection Process
Use this systematic approach to pinpoint exactly where your leak is coming from: Step 1: Dry Everything Completely Use a dry rag or paper towels to wipe up all water and dry everything beneath your sink, including the garbage disposal, drain pipes, water supply lines, and shut-off valves. Step 2: Run Water and Observe Turn on the faucet and let water run for 2-3 minutes. Use a flashlight to inspect underneath the sink, looking for new moisture or drips. Start at the top where pipes meet the sink basin and work your way down. Step 3: Conduct the Basin Test Plug your sink drain and fill the basin with water. Wait 5-10 minutes and check if the water level drops. If it does, you have a drain seal leak. Also check underneath for any drips during this test. Step 4: Check Supply Lines With the faucet off, inspect the flexible supply lines and their connections to the shut-off valves. Use dry tissue paper to blot around connections and check for moisture.How to Fix Common Sink Leaks
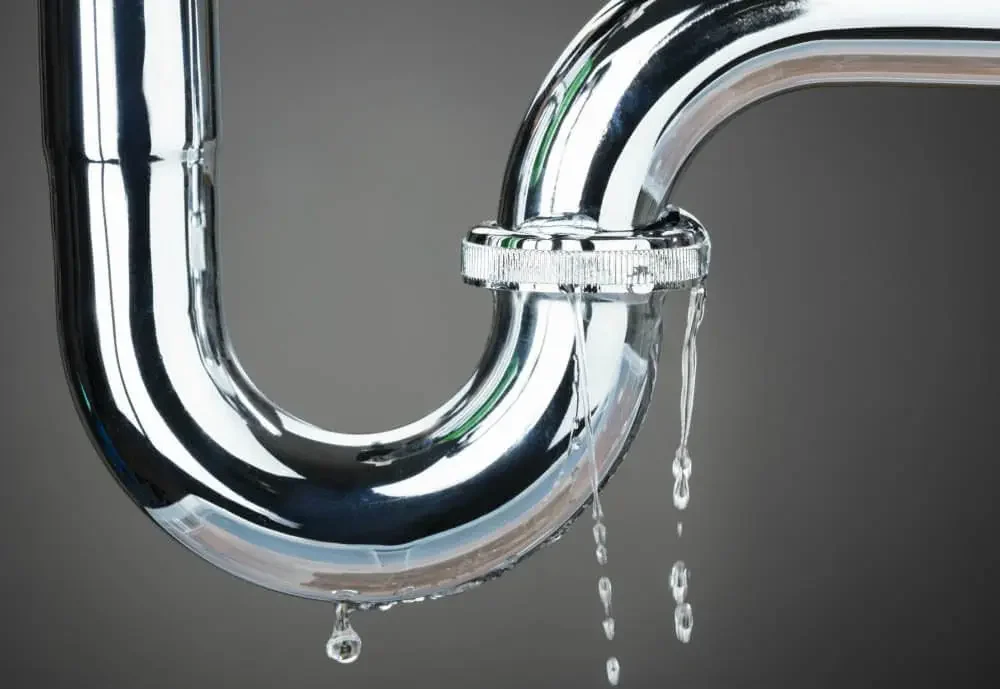
Fixing a P-Trap Leak
The P-trap is the most common source of leaks underneath sinks. Here's the step-by-step repair process: Tools You'll Need: - Adjustable wrench or pliers - Bucket or large bowl - Replacement washers (if needed) - Plumber's tape (optional) Process: 1. Place a bucket underneath the P-trap to catch any water 2. Tighten the slip nuts by hand first—these are the large nuts connecting the curved pipe. Don't overtighten, as this can crack the plastic fittings 3. Test for leaks by running water and observing the connections 4. If tightening doesn't work, unscrew the slip nuts and remove the P-trap 5. Inspect the washers inside the slip nuts—if they're worn, cracked, or hardened, replace them 6. Clean the threads on both the P-trap and the connecting pipes 7. Reassemble the P-trap with new washers, tightening by hand first, then a quarter-turn with pliers 8. Test again by running water and checking for leaks Pro Tip: If the P-trap itself is cracked or severely corroded, replacement is better than repair. P-trap assemblies are inexpensive ($10-20) and available at any hardware store.Fixing a Faucet Leak
Faucet leaks typically stem from worn internal components. The fix depends on your faucet type. For Compression Faucets (separate hot and cold handles): Tools You'll Need: - Screwdriver (Phillips and flathead) - Adjustable wrench - Replacement washers or O-rings - Plumber's grease Process: 1. Turn off water supply at the shut-off valves 2. Remove the decorative cap on the handle (usually pries off with a flathead screwdriver) 3. Unscrew the handle screw and lift off the handle 4. Use a wrench to remove the packing nut (the hexagonal nut visible once the handle is off) 5. Pull out the stem assembly and inspect the O-ring and washer at the bottom 6. Replace worn components with exact matches—bring old parts to the hardware store 7. Apply plumber's grease to the new O-ring before installation 8. Reassemble in reverse order, being careful not to overtighten 9. Turn water back on and test for leaks For Cartridge Faucets (single-lever): Process: 1. Turn off water supply 2. Remove handle by unscrewing the set screw (often hidden under a cap) 3. Remove the retaining nut or clip holding the cartridge in place 4. Pull out the old cartridge—you may need pliers if it's stuck 5. Install a new cartridge, ensuring it's oriented correctly (usually has alignment tabs) 6. Reassemble the faucet and test The Counter-Intuitive Insight: Many people assume faucet leaks mean you need a new faucet. In reality, 90% of faucet leaks can be fixed by simply replacing a $2-5 washer or O-ring—saving you $100-300 on a new faucet.Fixing a Drain Seal Leak
When water leaks around the drain opening itself, the seal between the drain and sink basin has failed. Tools You'll Need: - Plumber's putty or silicone sealant - Pipe wrench or large pliers - Putty knife or scraper Process: 1. Access the drain from underneath—you may need to remove the P-trap first 2. Unscrew the lock nut holding the drain flange in place (turn counterclockwise) 3. Remove the drain flange from the top of the sink 4. Clean all old putty or sealant from both the sink hole and the drain flange using a putty knife 5. Roll plumber's putty into a rope about ½ inch thick 6. Apply the putty rope around the underside of the drain flange lip 7. Insert the drain flange into the sink hole, pressing down firmly 8. Tighten the lock nut from underneath—the putty will squeeze out slightly 9. Remove excess putty from around the drain 10. Reconnect the P-trap and test by filling the sink For modern installations: Some plumbers prefer 100% silicone sealant instead of putty. Follow the same process but allow 24 hours for the silicone to cure before using the sink.Fixing Supply Line Leaks
Supply line leaks usually occur at connection points or indicate the hose itself needs replacement. Process: 1. Turn off water at the shut-off valves 2. Tighten connections at both ends—where the supply line connects to the faucet and to the shut-off valve 3. If tightening doesn't work, turn off the main water supply and disconnect the supply line 4. Inspect the washers at both ends of the supply line 5. Replace worn washers or the entire supply line if it's old (over 5 years) or showing signs of wear 6. Reconnect with new supply lines, ensuring connections are snug but not overtightened 7. Turn water back on slowly and check for leaks Safety Note: If you see bulging, cracking, or corrosion on supply lines, replace them immediately—these are signs of imminent failure that could cause flooding.The Practitioner's Reality Check
Preventing Future Sink Leaks
Monthly Inspection Checklist
Spend 5 minutes each month checking these areas: - Faucet base: Look for moisture or corrosion around the base where it meets the sink - Under-sink connections: Check P-trap connections, supply line connections, and shut-off valves for drips or moisture - Cabinet interior: Look for water stains, warping, or musty odors indicating hidden leaks - Drain seal: Periodically test by plugging the sink and seeing if it holds water - Supply lines: Inspect for bulging, cracking, or corrosion—replace if over 5 years oldMaintenance Best Practices
Don't overtighten connections during routine use or cleaning—this damages seals and threads Avoid harsh chemical cleaners in drains, as they can corrode pipes and degrade rubber washers over time Address small leaks immediately before they cause water damage or worsen Replace supply lines every 5-7 years proactively, even if they're not leaking—prevention costs $15, but flooding damage costs thousands Use leak detectors under sinks in high-risk areas like rental properties or vacation homes—smart leak detectors can send alerts to your phoneWhen to Upgrade Components
Sometimes prevention means replacing old components before they fail: - Supply lines older than 5 years: Replace proactively with braided stainless steel lines - P-traps showing corrosion: Replace rather than repair - Faucets over 15 years old: Modern faucets have better seals and water-saving features - Any component that's been repaired multiple times: Replacement is often more cost-effectiveEssential Tools and Materials
Frequently Asked Questions
What are the common causes of a leaking sink?
The most common causes include loose slip nuts on the P-trap, worn faucet washers or O-rings, degraded drain seals, damaged supply line connections, and corroded pipes. Each requires a different repair approach.
How do I turn off the water supply to my sink?
Locate the shut-off valves under the sink (usually two small knobs or handles) and turn them clockwise until fully closed. If there are no shut-off valves, you'll need to turn off your home's main water supply.
What tools do I need to fix a leaking sink?
Essential tools include an adjustable wrench, slip-joint pliers, screwdrivers, a bucket, and dry rags. For some repairs, you may also need a basin wrench for tight spaces.
Can I fix a leaking sink myself?
Yes, most sink leaks are DIY-friendly with basic plumbing knowledge and the right tools. Common repairs like tightening connections, replacing washers, or resealing drains can be completed in 30 minutes to 2 hours.
How often should I inspect my sink for leaks?
Inspect your sink monthly for early leak detection. Check under the sink, around the faucet base, and all visible connections for moisture, corrosion, or water stains.
What are the consequences of not fixing a leaking sink?
Ignoring a sink leak can lead to significant water damage to cabinets and flooring, mold growth (with associated health risks), structural damage, increased water bills, and potential pest problems from standing water.
How much water does a leaking sink waste?
A faucet dripping once per second wastes over 3,000 gallons annually. A steady drip can waste 10-20 gallons per day, significantly increasing your water bill and environmental impact.
When should I call a professional plumber instead of DIYing?
Call a professional for: leaks inside walls or floors, corroded pipes requiring replacement, leaks you can't locate, recurring leaks after multiple repair attempts, or any situation involving gas lines or electrical hazards.
How long do sink repairs typically last?
When done properly with quality parts, most sink repairs last 3-7 years. Faucet cartridge replacements can last 10+ years, while drain seal repairs typically last 5-8 years before needing attention.
Are supply line leaks dangerous?
Yes, supply line leaks can be dangerous because they're under constant water pressure. A failed supply line can flood your home with gallons of water per minute, causing extensive damage in a short time.