To fix frayed charging cables, first inspect the damaged area and confirm whether internal wires are exposed. Minor fraying can be reinforced using electrical tape or heat-shrink tubing to restore insulation and prevent further wear. If internal conductors are damaged, advanced repair may involve cutting, soldering, and insulating the wires — though replacing the cable is often the safest and most reliable solution.
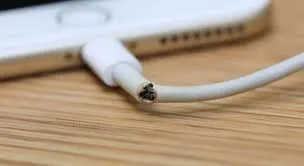
Don’t toss that frayed iPhone charging cable just yet!
Frayed charging cables are one of the most common everyday tech failures. In fact, most charging cables don’t stop working because of internal electronics — they fail because of mechanical stress, especially near the connector where the cable bends repeatedly.
The good news?
In many cases, a frayed charging cable can be safely reinforced and reused, saving money and reducing electronic waste. The key is knowing when a repair is safe and when replacement is the smarter option.
This guide breaks down:
* Why charging cables fray in the first place
* How to assess whether your cable is repairable
* Step-by-step repair methods (from beginner to advanced)
* Common mistakes that make damage worse
* Proven ways to prevent fraying in the future
If you’re optimizing multiple repair articles, this guide is structured to match search intent, featured-snippet formatting, and EEAT best practices.
Why Charging Cables Fray So Easily
Understanding why charging cables fail helps you fix and prevent the problem long-term.
Most frayed charging cables break down due to:
* Repeated bending at stress points (near the Lightning connector or USB end)
* Tight coiling when storing cables
* Pulling the cable instead of the connector
* Low-quality insulation materials
* Heat exposure (charging near pillows, laptops, or power bricks)
Apple-style Lightning cables are especially vulnerable because the strain relief near the connector is short. Over time, the outer jacket cracks, exposing internal insulation and eventually the conductors themselves.
Once fraying starts, damage accelerates quickly unless reinforced.
Diagnosing the Damage
Before attempting any repair, unplug the cable completely and inspect it under good lighting.
Check for:
* Cracks or splits in the outer jacket
* Soft or “mushy” spots near the connector
* Visible inner insulation (usually white or colored)
* Exposed copper or metal strands
* Intermittent charging when the cable is bent
If the cable still charges reliably and no bare metal is exposed, repair is usually safe.
If you see exposed conductors, sparks, heat buildup, or burning smells, stop using the cable immediately — this is a replacement scenario, not a repair.
Tools and Materials Needed
Depending on damage severity, gather:
* Electrical tape (PVC-based, not paper tape)
* Heat-shrink tubing (3:1 shrink ratio preferred)
* Heat source (heat gun, hair dryer, or lighter with caution)
* Scissors or utility knife
* Optional: soldering iron, solder, wire stripper (advanced repairs)
Safety note: Never attempt repairs while the cable is plugged in.
Method 1: Electrical Tape (Temporary Fix)
Best for: light surface fraying with no exposed wires.
1. Clean the damaged area with a dry cloth
2. Stretch electrical tape slightly as you wrap
3. Overlap each wrap tightly for strength
4. Extend at least 1–2 cm beyond the damaged area
This method restores insulation but does not provide strain relief, so expect limited longevity.
Method 2: Heat-Shrink Tubing (Recommended)
Best for: moderate fraying near connectors.
1. Cut tubing slightly longer than the damaged area
2. Slide it over the cable before applying heat
3. Center it over the fray
4. Apply heat evenly until it contracts snugly
Heat-shrink tubing reinforces insulation and adds strain relief, making it the most reliable DIY solution.
Method 3: Solder Repair (Advanced)
Best for: internal wire separation without connector damage.
Steps include:
* Cutting out damaged cable section
* Stripping insulation from inner wires
* Matching and soldering conductors
* Insulating each wire individually
* Applying outer heat-shrink tubing
⚠️ This method requires electronics experience. Improper soldering can cause shorts or overheating.
Pro Tip: If the damage is inside the Lightning connector housing, replacement is almost always safer than repair.
Safety Considerations (Read This First)
Repairing frayed charging cables involves electrical current, even at low voltage.
Never repair if:
* Copper strands are exposed
* The cable overheats during use
* Charging cuts in and out unpredictably
* The cable shows burn marks
Using a damaged cable can lead to:
* Phone damage
* Power adapter failure
* Fire risk in extreme cases
When in doubt, replace the cable — safety always outweighs savings.
The Cost-Benefit Analysis
Repairing makes sense for early-stage damage. Replacement is better for advanced wear.
Repairing
Replacing
Cost
$0 – $10
$20 – $50+
Time
15–45 minutes
Immediate
Environmental Impact
Reduces e-waste
Adds to e-waste
Durability
Medium
High
Safety
Conditional
Highest
How to Prevent Frayed Charging Cables
Prevention is far easier than repair.
Best practices:
* Pull from the connector, not the cable
* Avoid sharp bends near plugs
* Use cable protectors or springs
* Store cables loosely (never tightly wrapped)
* Keep cables away from heat sources
* Unplug by gripping the head, not yanking
A $2 cable protector can add months or years to a cable’s life.
Common Myths About Fixing Frayed Cables
Myth: Superglue fixes frayed cables
→ Reality: It becomes brittle and cracks insulation
Myth: Any tape works
→ Reality: Only electrical-grade tape is safe
Myth: If it charges, it’s safe
→ Reality: Internal damage can worsen silently
Myth: Repairing voids phone warranty
→ Reality: The cable isn’t the phone — unsafe cables cause more damage
The Practitioner’s Reality Check
The Counter-Intuitive Insight: Most frayed cables fail mechanically, not electrically — reinforcing strain points early prevents failure altogether.
The Common Trap: Waiting too long. Once copper is exposed, repair becomes unsafe and unreliable.
Frequently Asked Questions
Can I use superglue to fix a frayed cable?
No. Superglue becomes rigid and can crack insulation, increasing failure risk. Use electrical tape or heat-shrink tubing instead.
How long does a repaired cable last?
Heat-shrink repairs can last months with proper handling. Tape-only fixes are short-term.
Is it safe to repair frayed charging cables?
Yes — only if internal wires are not exposed. Exposed conductors mean replacement is safer.
What’s the best repair method?
Heat-shrink tubing offers the best balance of durability, safety, and appearance.