Fixes might be blogged to help others — your data stays safe.
SnapToFix | Fix Cracked Caulk on Stairs in 3 Simple Steps
Fix Cracked Caulk on Stairs in 3 Simple Steps
Published: 1/8/2026
Cracking Caulk on Stairs? Fix It in 3 Steps
Cracking caulk on stairs usually happens because stair surfaces are constantly moving and flexing, or because the wrong type of caulk was used. The solution is to remove all old, cracked caulk, clean and prep the surface, then reapply high-quality, flexible caulk designed for high-traffic joints to ensure long-lasting adhesion.
The Hard Truth: Cracking caulk on stairs isn’t just ugly — it’s a sign your sealant isn’t doing its job.
Caulk is designed to seal gaps against moisture, dust, and air — but when stairs flex under foot traffic, old or improper caulk often fails, leaving visible cracks or gaps that invite dirt and moisture over time.
In this guide, we break down the 3-step fix for cracking caulk on stairs, explain why it happens, and show how to get a long-lasting result with the right tools and technique.
Tools and Materials You’ll Need
To repair cracking caulk on stairs effectively, gather:
* Caulk removal tool or utility knife — to cut and scrape away the old caulk cleanly.
* Vacuum or brush — to remove dust and debris after removal.
* High-quality flexible caulk — choose a sealant that’s labeled for interior trim, flexible seams, or high-traffic areas (silicone or elastomeric latex works well).
* Caulk gun — to apply the new caulk evenly.
* Painter’s tape (optional) — for cleaner edges.
* Damp sponge or finishing tool — to smooth the caulk bead.
Pro Tip: Using painter’s tape along edges before you caulk can help achieve crisp, straight lines that look professional.
Step 1: Remove Old Caulk
Before you can caulk again, remove all the cracked, dried caulk — simply running a new bead over the old won’t bond properly.
1. Use a caulk removal tool or utility knife to slice and scrape out old caulk.
2. Work carefully to avoid marring the surrounding wood or paint finish.
3. After scraping, vacuum or brush out any loose debris.
This step is crucial: old, flaky caulk prevents new material from adhering and will lead to premature cracking if not removed.
Step 2: Prepare and Apply New Caulk
Once the surface is clean:
1. Wipe down with a slightly damp cloth to remove fine dust and let it dry completely.
2. Load your caulk gun and cut the tube’s nozzle at a 45-degree angle — this helps you control bead size.
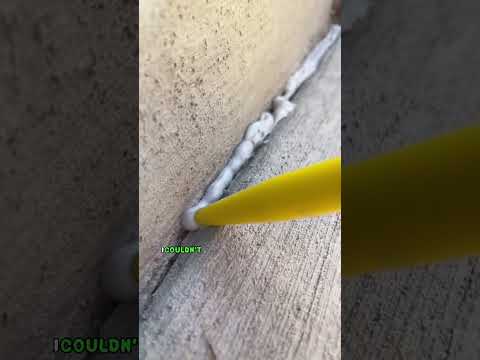
3. Hold the gun at a steady angle and apply a continuous bead of flexible caulk along the seam or gap.
4. Smooth the bead using a damp finger or a finishing tool for a neat look.
Good preparation and a continuous bead help the caulk adhere well and flex with movement, reducing future cracking.
Step 3: Let It Cure Properly
After applying and smoothing:
* Check the product’s label for recommended drying time — typically a few hours to dry to the touch and up to 24 hours to fully cure. :contentReference[oaicite:16]{index=16}
* Avoid heavy traffic on the stairs until the caulk cures to prevent distortion or gaps.
Proper curing ensures the caulk seals fully and bonds to both surfaces for durability, especially on high-use areas like stairs.
The Trade-Off Matrix
| Variable | DIY Approach | Hiring a Professional |
|----------|---------------|------------------------|
| Cost | Lower | Higher |
| Time | Moderate | Shorter |
| Control | Full control | Less control |
| Skill Required | Some DIY skill | Minimal |
| Finish Precision | Depends on practice | Very high |
Variable
DIY Approach
Hiring a Professional
Cost
Lower
Higher
Time
Moderate
Shorter
Control
Full control
Less control
Skill Required
Some DIY skill
Minimal
Finish Precision
Depends on practice
Very high
The Practitioner’s Reality Check
The Counter-Intuitive Insight: Cracking caulk is often blamed on poor-quality caulk, but surface prep and flexibility matter more — even premium caulk fails if applied over old residue or rigid compounds.
The Common Trap: Skipping removal of old caulk or using rigid acrylic caulk on flexing stair edges leads to repeat cracking. Stick to flexible, well-prepped application for best results.
Frequently Asked Questions
Why does caulking on stairs crack?
Caulk cracks on stairs mainly because stair materials expand, contract, and flex with foot traffic. Caulk that’s too rigid or applied over old residue won’t flex and will split over time. Using flexible, high-quality caulk and proper prep prevents this.
How do I remove old caulk safely?
Use a caulk removal tool or sharp utility knife to cut and scrape away old caulk. Work slowly so you don’t damage surrounding wood or paint. After removal, clean the surface of debris before re-caulking.
What caulk should I use on stairs?
Choose caulk labeled for interior trim and high-traffic areas. Flexible options like acrylic-latex with added silicone are ideal because they can expand and contract with foot traffic without cracking.
Can I paint caulk after it cures?
Yes — if you use a paintable caulk and let it fully cure first, you can paint over it to match surrounding trim or stair colors.
How long does new caulk take to dry?
Most flexible caulks are dry to the touch within a few hours, but full curing may take up to 24 hours depending on product and humidity. Always follow the manufacturer’s instructions.