How to Upgrade a Quiet Speaker for a Budget-Friendly Sound Boost
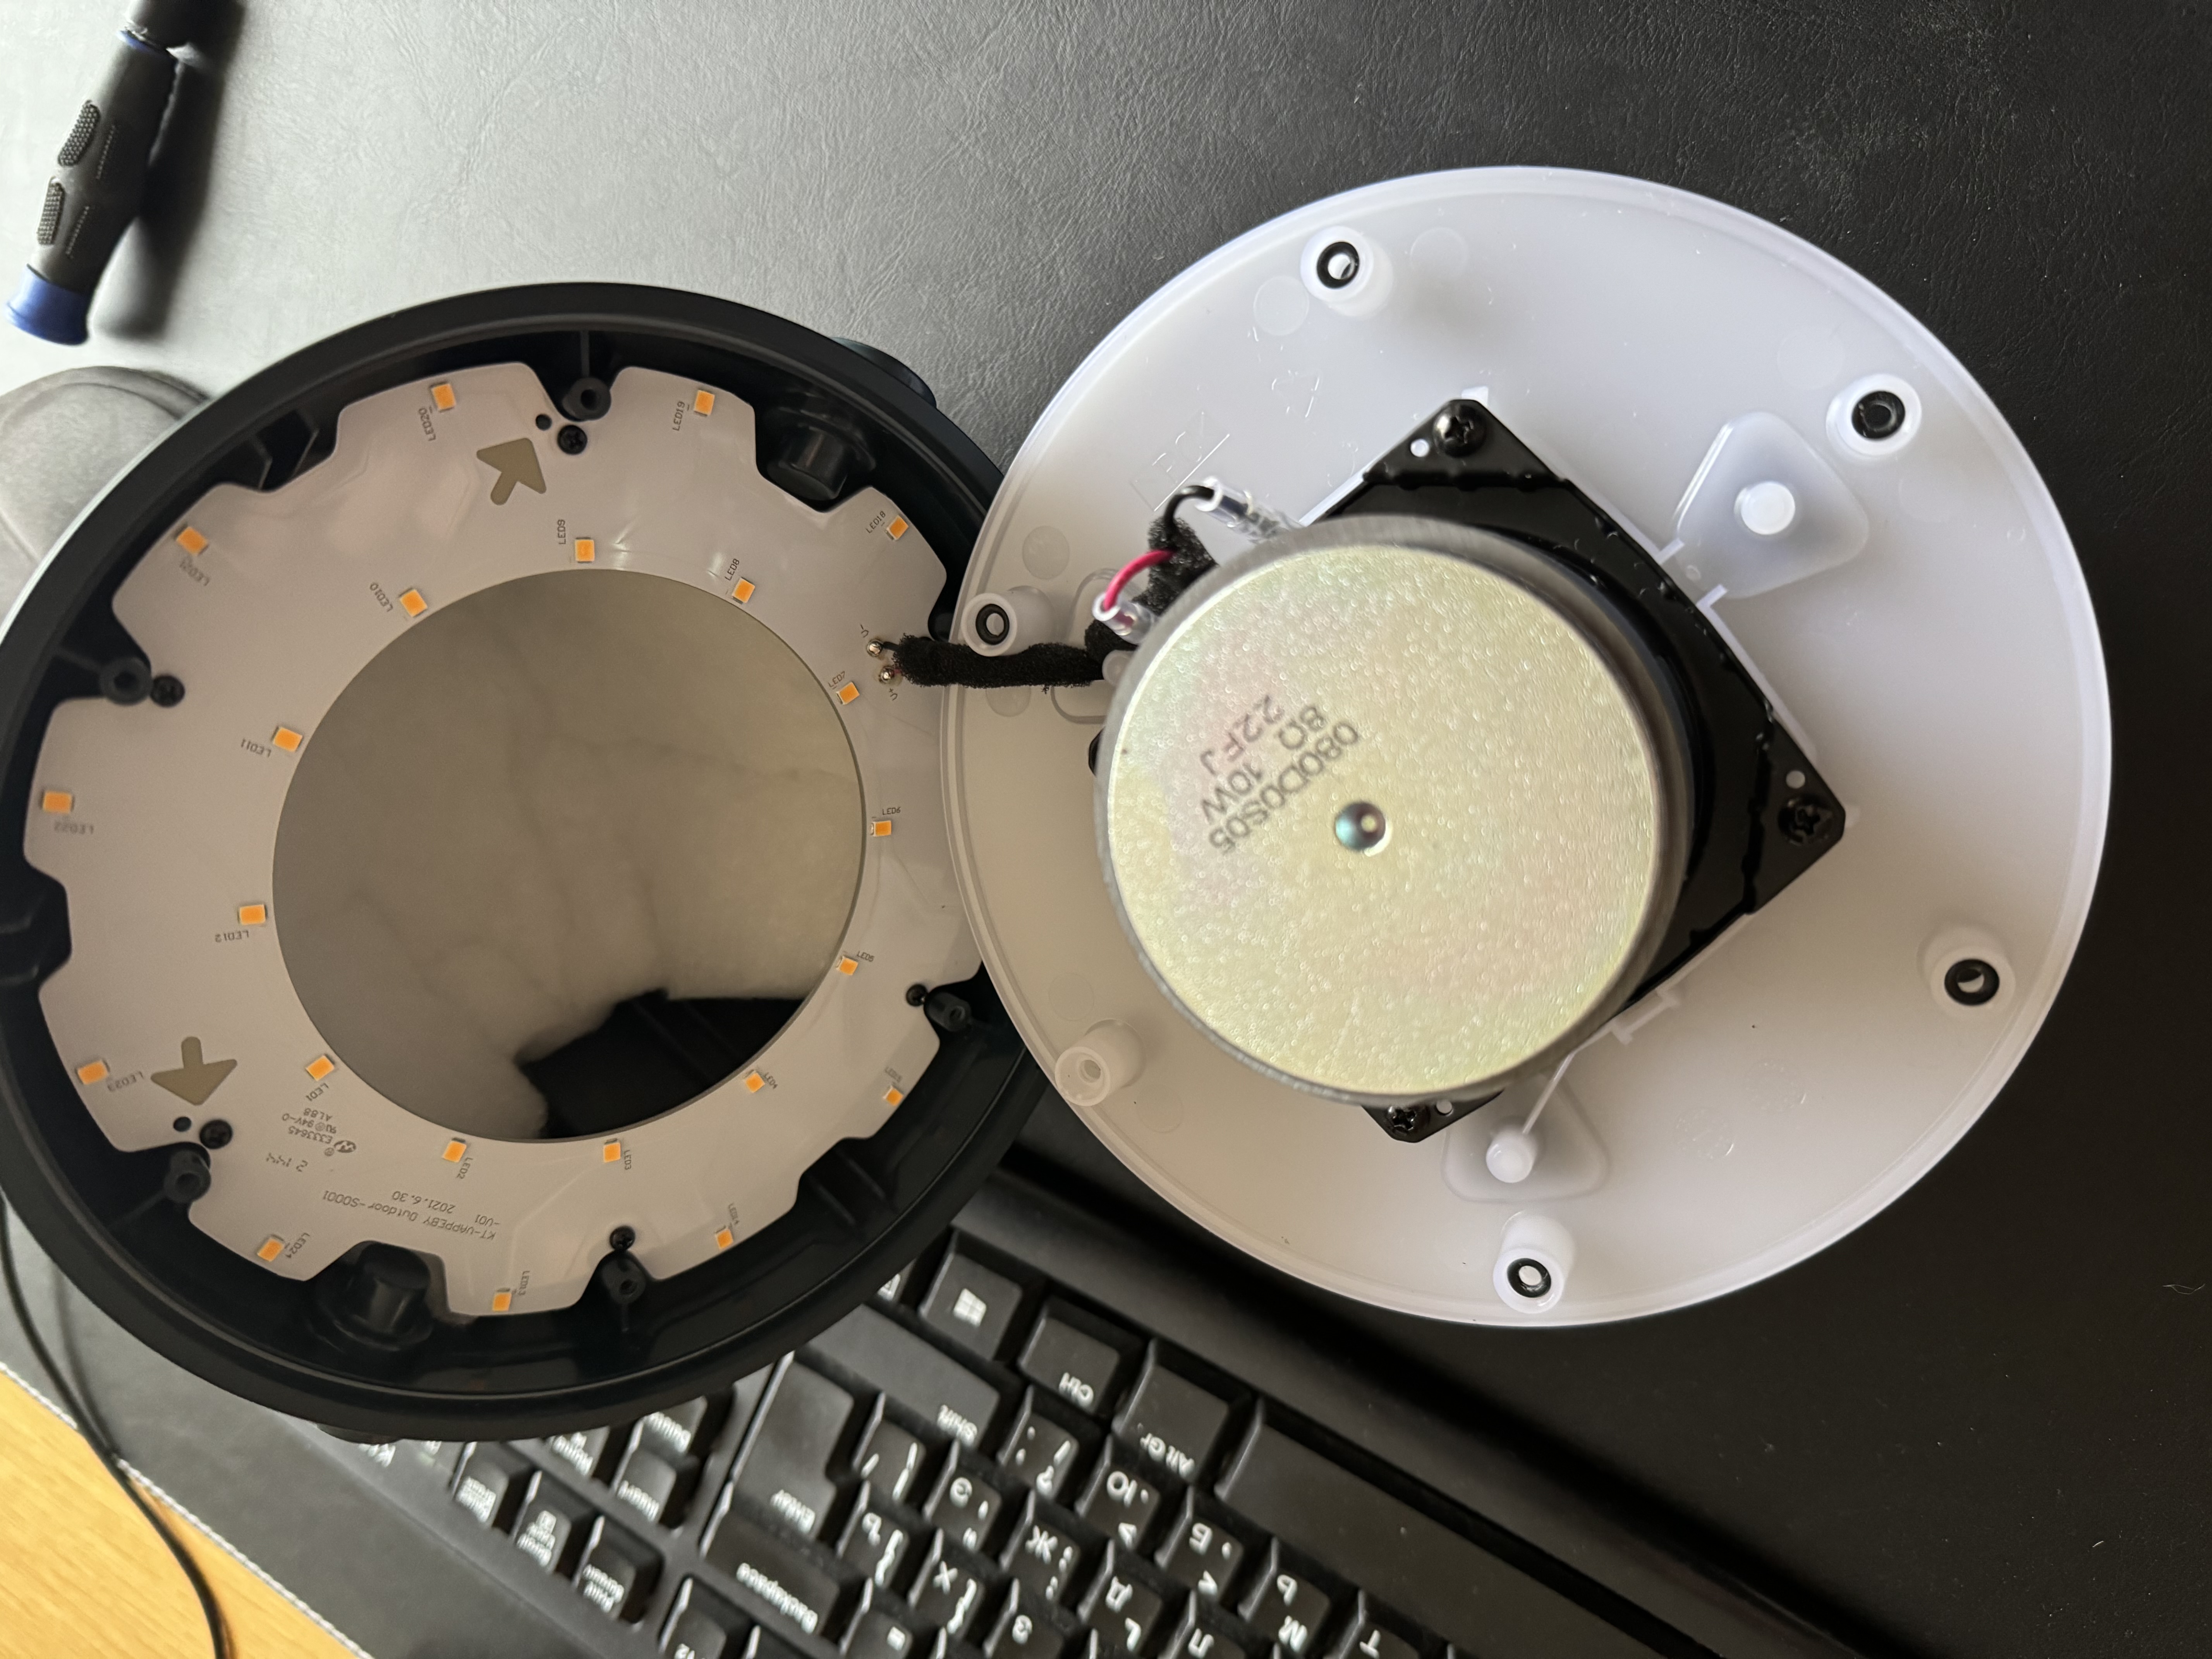
The user describes the issue with their speaker: "Sound is too quiet. Need louder speaker. Find compatible.". The provided image shows a disassembled speaker with a visible internal component, likely the speaker driver.
Assuming the issue is with the speaker's volume output, the likely cause of damage is unknown, but it could be due to a faulty or low-quality speaker driver.
Addressing this issue is important because a louder speaker enhances the overall audio experience and prevents straining to hear.
This DIY approach reassures users that a repair or upgrade is affordable and achievable with minimal expertise.
Overview:
- Repair Process: Replacing or upgrading the speaker driver with a compatible, louder alternative.
- Estimated Time: 30–60 minutes.
- Skill Level: Beginner; no prior repair experience needed.
- Prerequisites: A clean workspace, basic household tools (e.g., screwdrivers), and a compatible speaker driver.
- Expected Outcome: A speaker with improved volume output.
- Safety Precautions: Handle electrical components with care; avoid short circuits.
- Cost-Saving Benefits: This repair uses affordable materials, avoiding expensive professional services or new speaker purchases.
- Professional Help: If unsure about compatibility or uncomfortable with DIY, consider consulting a professional.
Tools and Materials Required:
- Screwdrivers (flathead and Phillips)
- A compatible, louder speaker driver (available at electronics stores or online marketplaces like eBay or Amazon)
- Electrical tape or wire connectors
- A multimeter (optional)
Step-by-Step Repair Guide:
- Disassemble the Speaker:
- Use a screwdriver to remove screws holding the speaker casing together.
- Safety Check: Ensure the speaker is unplugged from the power source.
- Identify the Speaker Driver:
- Locate the existing speaker driver, usually marked with specifications (e.g., impedance, wattage).
- Tip: Take a photo of the driver for reference when searching for a replacement.
- Determine Compatibility:
- Note the impedance (e.g., 4 ohms, 8 ohms) and wattage rating.
- Search for a compatible driver with similar or higher wattage for a louder output.
- Remove the Old Driver:
- Carefully desolder or disconnect wires from the old driver.
- Troubleshooting: If wires are corroded, clean them with a soft brush.
- Install the New Driver:
- Solder or connect wires to the new driver, ensuring correct polarity.
- Safety Check: Verify connections are secure to avoid short circuits.
- Reassemble the Speaker:
- Reattach the speaker casing and secure with screws.
Estimated Cost:
- Speaker Driver: $10–$30 (depending on wattage and impedance)
- Tools: Assuming you have basic tools, no additional cost.
Tips and Warnings:
- Test Compatibility: Ensure the new driver matches the old one's specifications.
- Avoid Overheating: Use a soldering iron with caution to prevent damage or injury.
- Future Maintenance: Regularly clean the speaker to prevent dust buildup.
Additional Engagement Elements:
- FAQ:
- Q: Can I use any speaker driver?
A: No, ensure compatibility with your speaker's specifications.
- Q: What if I’m not comfortable with soldering?
A: Consider consulting a friend or professional.
By following these steps, you can achieve a louder speaker without breaking the bank.


