Fix a Plaster Hole in Your Wall on a Budget
Description of Issue:
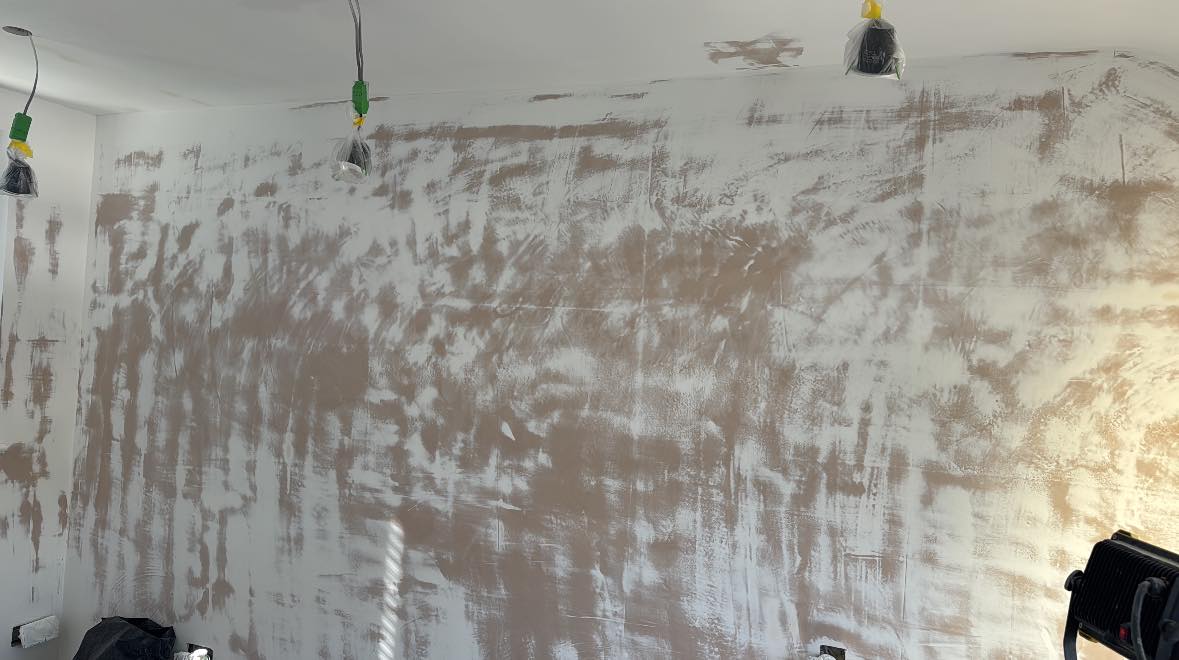
The user has described the issue as "fix this plaser from my wall". The provided image appears to show a wall with a large area of plaster damage, likely from removing a fixture or due to wear and tear. The wall shows significant patches of exposed brown surface beneath a layer of white plaster, indicating a hole or extensive damage. The likely cause of the damage is unknown but could be due to accidental impact, removal of wall-mounted items, or water damage. It’s essential to fix plaster holes to prevent further damage, maintain the wall’s structural integrity, and improve aesthetics. This DIY repair guide will walk you through a budget-friendly method to fix the plaster hole.
Overview:
This guide will walk you through repairing a plaster hole in your wall using simple, low-cost methods. The repair process involves filling the hole with plaster filler, sanding, and painting. This DIY approach requires minimal tools and expertise, making it perfect for beginners.
- Estimated Time: 1–2 hours
- Skill Level: Beginner, no prior repair experience needed
- Prerequisites: Clean workspace, basic household items (e.g., dry cloth, well-lit area)
- Expected Outcome: A restored wall with minimal visible damage
- Safety Precautions: Wear gloves and a mask when handling plaster and sanding
- Cost-Saving Benefits: This repair uses affordable materials, avoiding expensive professional services
- Professional Help: For extensive or structural damage, consider consulting a professional
Tools and Materials Required:
- Plaster filler (e.g., spackling compound): $5–$10
- Sandpaper (medium and fine grit): $2–$5
- Paint (matching wall color): $5–$10
- Paintbrush: $1–$3
- Dry cloth
- Water
- Optional:
- A putty knife for applying filler (likely already owned)
- A sanding block (can borrow or rent)
Step-by-Step Repair Guide:
- Clean the Area: Use a dry cloth to remove any loose debris or dust from the damaged area.
- Apply Plaster Filler: Use a putty knife to fill the hole with plaster filler. Apply in layers if necessary, allowing each layer to dry completely.
- Smooth the Surface: Once the filler is dry, use medium-grit sandpaper to smooth the area. Sand in circular motions to blend with the surrounding wall.
- Check for Smoothness: Run your hand over the area to ensure it’s smooth. If needed, apply additional filler and sand again.
- Fine Sanding: Switch to fine-grit sandpaper for a final smooth finish.
- Paint the Wall: Once the area is smooth, apply a coat of paint that matches the wall color.
- Touch-ups: If necessary, apply additional coats of paint to achieve a seamless finish.
Estimated Cost:
- Materials:
- Plaster filler: $5–$10
- Sandpaper: $2–$5
- Paint: $5–$10
- Total: $12–$25
Tips and Warnings:
- Test plaster filler on a hidden area to ensure color match.
- Use leftover plaster filler for future repairs.
- Avoid over-sanding, as it may create more damage.
- Wear a mask when sanding to avoid inhaling dust.
- For large holes or structural damage, consider professional help.
Additional Engagement Elements:
FAQ:
Q: Can I use spackling compound instead of plaster filler?
A: Yes, spackling compound works for small holes, but plaster filler is better for larger areas.
Q: What if I don’t have a putty knife?
A: Use a flat, blunt tool like a butter knife or an old credit card.
Q: How can I prevent future plaster damage?
A: Regularly inspect walls for cracks and address them promptly to prevent expansion.
This guide provides a practical, budget-friendly solution for fixing a plaster hole in your wall. By following these steps, you can achieve professional-quality results without breaking the bank.


