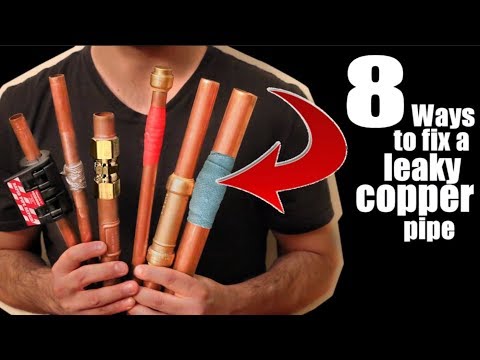
Fix a Leaking Copper Pipe
Overview:
- Repair Summary: This repair entails fixing a leaking copper pipe, likely by replacing the damaged section or using an epoxy or sealant to seal the leak.
- Estimated Time: The repair can take anywhere from 30 minutes to several hours, depending on the complexity of the leak and the method of repair.
- Skill Level: This repair requires an intermediate skill level, as it involves working with copper pipes and potentially soldering or using sealants.
- Prerequisites: Ensure you have a clean workspace, and the area around the leak is dry and accessible. Prior knowledge of basic plumbing repairs is beneficial.
- Expected Outcome: The expected outcome is a fully functional, leak-free copper pipe.
- Safety Precautions: Before starting, ensure you turn off the water supply to the pipe. Wear protective gloves and eyewear to prevent injury from sharp edges or chemical exposure.
Tools Required:
- Adjustable wrench or pipe wrench
- Pipe cutter
- Soldering torch (if soldering)
- Solder
- Flux
- Epoxy or pipe sealant (if not soldering)
- Teflon tape
- Pipe brush (for cleaning)
- Safety glasses
- Gloves
Step-by-Step Repair Guide:
- Turn Off the Water Supply: Locate the shut-off valve for the water supply line and turn it clockwise to shut off the water supply. Open a nearby faucet to drain the water from the pipe.
- Clean the Area: Use a pipe brush to clean the area around the leak. Remove any insulation or debris to access the damaged section.
- Assess the Damage: Examine the leak to determine its cause and extent. Check for corrosion, cracks, or loose fittings.
- Cut Out the Damaged Section (if necessary): If the leak is due to a damaged section of pipe, use a pipe cutter to cut out the damaged part. Be careful not to cut yourself on sharp edges.
- Prepare the Pipe (if soldering): Clean the ends of the pipe and the new section with a pipe brush. Apply flux to the ends.
- Solder the Joint (if soldering): If using soldering, heat the joint with a soldering torch and apply solder. Ensure the solder flows smoothly around the joint, indicating a good seal.
- Apply Epoxy or Sealant (if not soldering): If not soldering, apply an epoxy or pipe sealant to the damaged area according to the product instructions. Ensure the area is clean and dry before application.
- Reassemble and Test: If you cut out a section, reassemble the pipe using new fittings if necessary. Turn on the water supply and check for leaks.
Estimated Cost:
- Replacement Parts: A new section of copper pipe can cost between $10 to $50, depending on the length and diameter. Solder, flux, and other materials may cost an additional $10 to $20.
- Tools: If you don’t already have the necessary tools, the cost can range from $50 to $200, depending on what you need to purchase.
- Labor Cost: If hiring a professional, the labor cost can range from $75 to $200 per hour, depending on the location and complexity of the repair.
Tips and Warnings:
- Use Proper Safety Gear: Always wear safety glasses and gloves when working with sharp objects and chemicals.
- Turn Off the Water Supply: Ensure the water supply is turned off before starting the repair to prevent flooding and further damage.
- Check for Corrosion: If the leak is due to corrosion, consider replacing the entire section of pipe to prevent future leaks.
- Follow Product Instructions: If using an epoxy or sealant, follow the product instructions carefully to ensure a proper seal.
- Consider Professional Help: If you are not comfortable with the repair or if the leak persists after attempting to fix it, consider hiring a professional plumber.