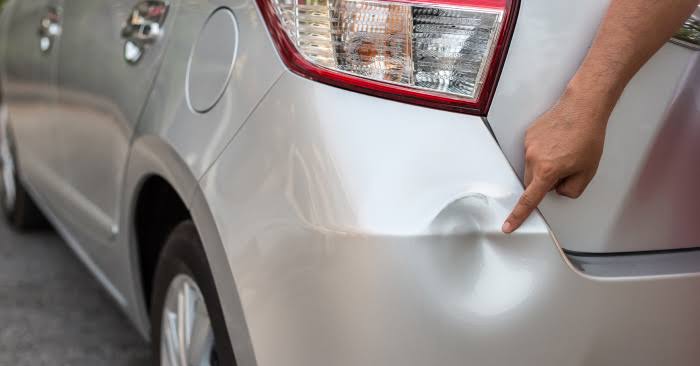
Fix a Dent on the Bumper of a Car
Overview:
- Repair Summary: This repair entails fixing a dent on the car's bumper. The process may involve using specialized tools to pop out the dent or applying a filler and repainting the area if the damage is more severe.
- Estimated Time: The estimated time required to complete the repair can range from 30 minutes to several hours, depending on the method used and the extent of the damage.
- Skill Level: The skill level needed is intermediate. Some methods, like using a dent puller, can be relatively straightforward, while others, like applying body filler and repainting, require more experience.
- Prerequisites: A clean workspace, dry environment, and prior knowledge of basic car repair techniques are recommended. Ensure the car is parked on a level surface and apply the parking brake.
- Expected Outcome: The expected outcome is a fully functional and aesthetically pleasing car bumper, free of dents.
- Safety Precautions: Wear protective gear such as gloves and safety glasses. Ensure proper ventilation if using chemicals.
Tools Required:
- Dent puller or dent repair kit
- Gloves
- Safety glasses
- Cleaning solution and microfiber cloth
- Body filler (if necessary)
- Sandpaper (various grits)
- Paint (matching the car's color)
- Paintbrushes or spray gun
- Primer (if necessary)
Optional Tools:
- Heat gun (for shrinking metal)
- Metal tap down tool
Step-by-Step Repair Guide:
- Assess the Damage: Examine the dent to determine its size, location, and depth. Decide on the best approach for repair.
- Clean the Area: Use a cleaning solution and microfiber cloth to thoroughly clean the area around the dent. Remove any dirt, wax, or debris.
- Apply Dent Puller: If using a dent puller, attach it according to the manufacturer's instructions. Gently pull the dent outwards until it is no longer visible or significantly reduced.
- Use a Dent Repair Kit: If the dent puller does not fully remove the dent, use a dent repair kit. This may involve applying a special adhesive and using tools to push the dent out from the inside.
- Apply Body Filler (if necessary): If the dent has left a hole or the metal is crumpled, apply body filler to smooth out the area. Allow it to dry according to the manufacturer's instructions.
- Sand the Area: Use sandpaper to smooth out the area, starting with a coarse grit and progressing to finer grits for a smooth finish.
- Prime and Paint: If necessary, prime the area with a coat of primer. Then, apply paint that matches the car's color. Allow it to dry according to the manufacturer's instructions.
- Inspect and Finish: Inspect the area to ensure the dent is fully repaired and the paint matches. Apply a clear coat if necessary.
Estimated Cost:
- Replacement Parts: $50-$200 (depending on the extent of the damage and the need for paint or fillers)
- Tools: $20-$100 (depending on the tools needed)
- Labor Cost (optional): $100-$500 (depending on the professional's rate and the complexity of the repair)
Tips and Warnings:
- Practical Tips:
- Ensure the area is well-lit to see the dent clearly.
- Use a dolly or a block of wood to support the metal while pushing out the dent.
- Apply heat to the metal to make it more malleable.
- Warnings:
- Avoid using harsh chemicals that can damage the car's paint.
- Do not attempt to repair the dent if it is near a seam or if the metal is severely crumpled, as this may require professional expertise.
- Wear protective gear to avoid injury from sharp edges or chemicals.


