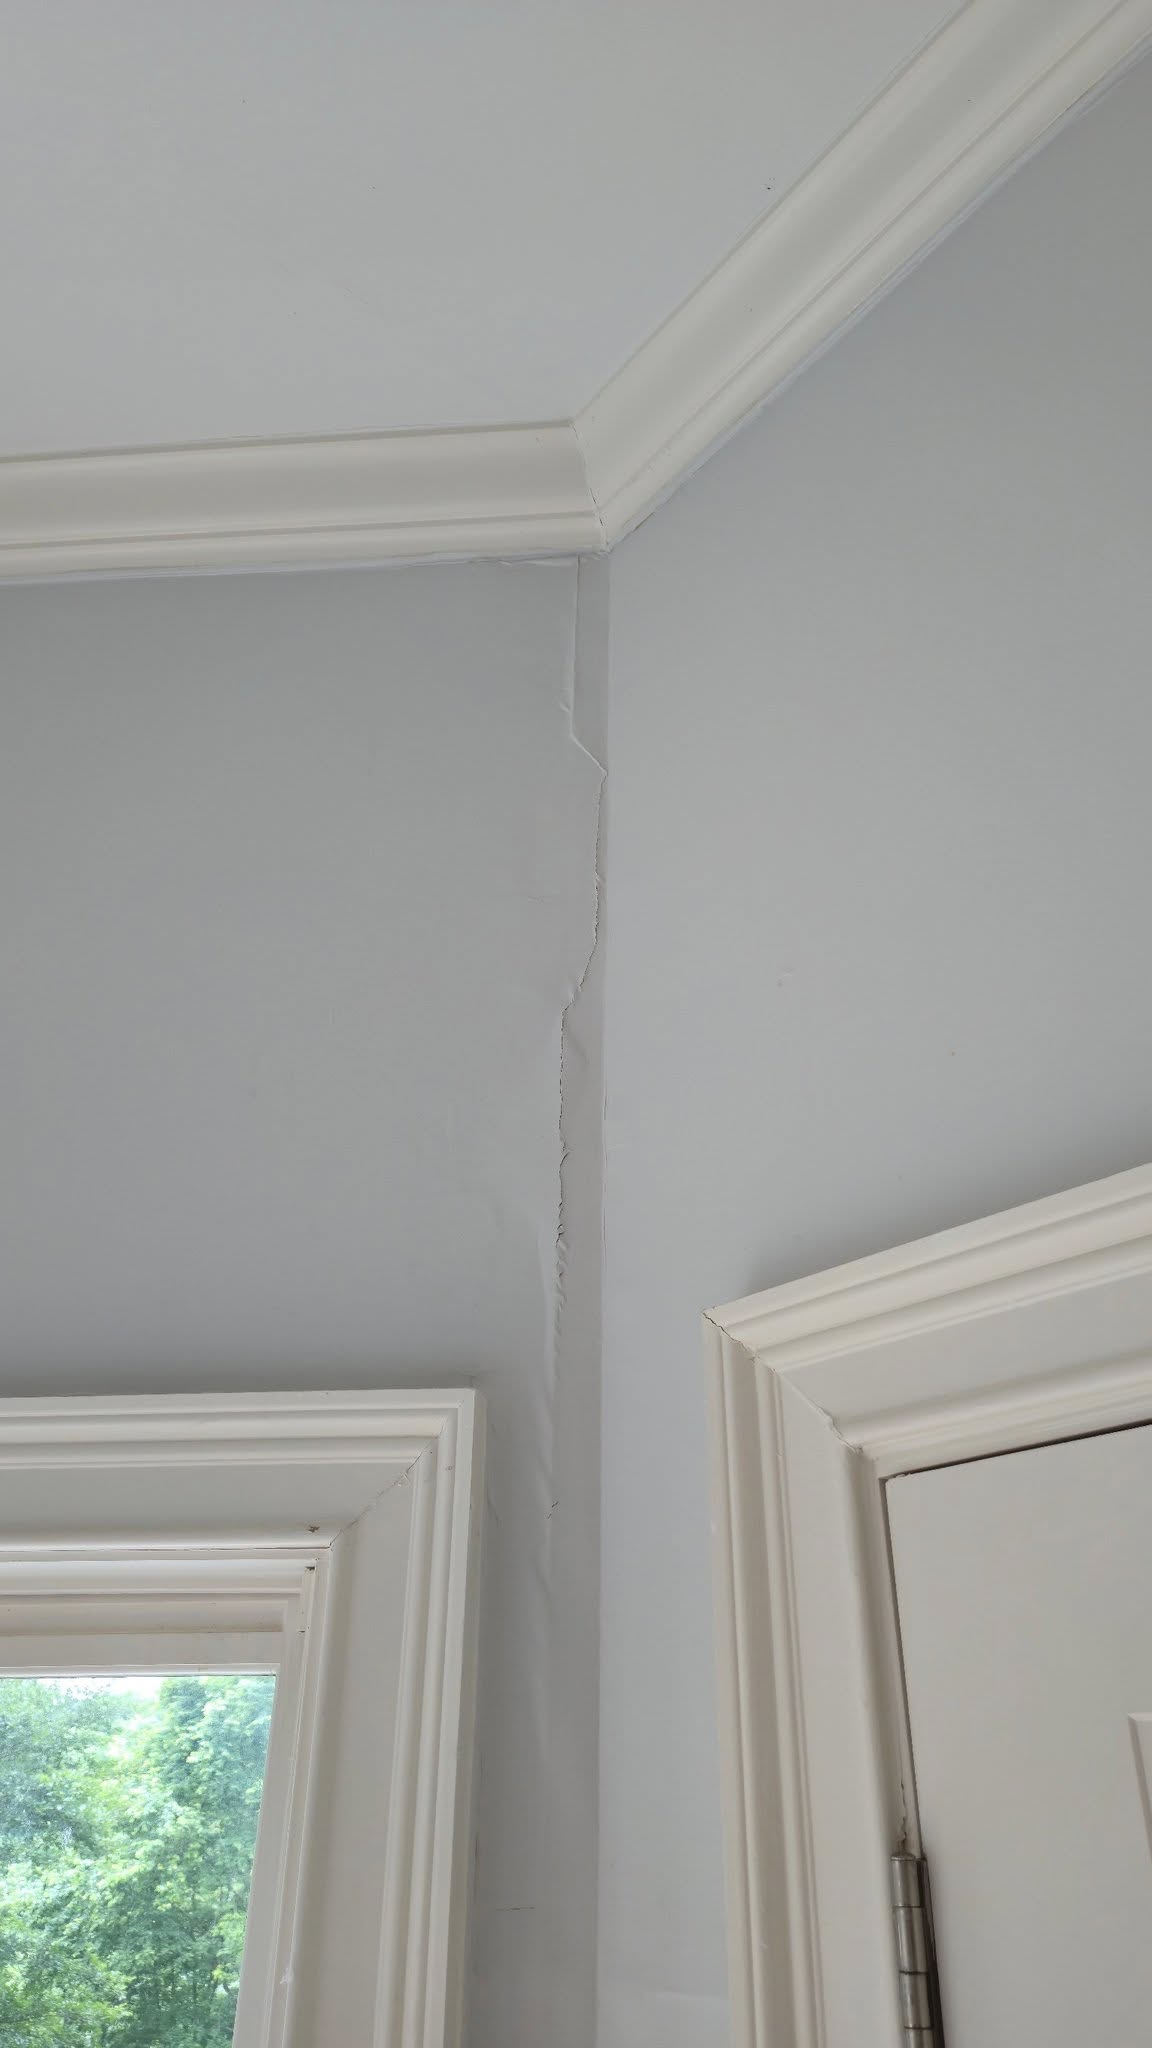
Fix a Damaged Drywall Corner of a Room
Overview:
- Repair Entails: This repair involves fixing the damaged drywall corner, which may include removing the damaged drywall, inspecting for and addressing the source of the leak, and repairing or replacing the drywall.
- Estimated Time: The estimated time required is 2-5 hours, depending on the extent of the damage and the source of the leak.
- Skill Level: The skill level needed is intermediate, requiring basic carpentry and drywall repair skills.
- Prerequisites: A clean workspace, dry environment, and prior knowledge of basic drywall repair techniques are recommended.
- Expected Outcome: The expected outcome is a fully functional and aesthetically pleasing corner of the room with no signs of damage.
- Safety Precautions: Wear protective gear, including gloves, safety glasses, and a dust mask. Ensure the area is well-ventilated.
Tools Required:
- Utility knife or drywall saw
- Drywall repair mesh or tape
- Joint compound (spackling compound)
- Sandpaper (medium and fine grit)
- Paintbrush or putty knife
- Water
- Cleaning cloth
- Safety gear (gloves, safety glasses, dust mask)
- Optional: dehumidifier, leak detection equipment
Step-by-Step Repair Guide:
- Identify and Address the Source of the Leak: Before starting the repair, ensure the source of the leak is identified and fixed. This may involve checking the roof, windows, and pipes.
- Clean the Area: Use a cleaning cloth and water to remove any dirt, grime, or mold from the damaged area. Allow the area to dry completely.
- Remove Damaged Drywall: Use a utility knife or drywall saw to carefully remove the damaged drywall, taking care not to spread the damage further.
- Inspect and Dry the Area: Inspect the area behind the drywall for any signs of water damage or mold. Use a dehumidifier if necessary to dry the area completely.
- Apply Drywall Repair Mesh or Tape: Apply drywall repair mesh or tape to the edges of the drywall to reinforce it.
- Apply Joint Compound: Use a putty knife to apply joint compound to the damaged area, spreading it smoothly and evenly. Allow the compound to dry according to the manufacturer's instructions.
- Sand the Area: Use medium-grit sandpaper to sand the area smooth, feathering the edges outwards to blend with the surrounding drywall.
- Apply Additional Coats of Compound: Apply additional coats of joint compound, sanding between coats until the area is smooth and even.
- Paint the Area: Once the repair is complete, paint the area to match the surrounding wall.
Estimated Cost:
- Replacement Parts: $20-$50 (drywall repair mesh or tape, joint compound, sandpaper)
- Tools: $50-$100 (utility knife, drywall saw, putty knife, safety gear) - assuming you don't already have basic tools
- Labor Cost: $200-$500 (if hiring a professional) - depending on location and extent of damage
Tips and Warnings:
- Ensure the area is completely dry before starting the repair to prevent further damage or mold growth.
- Wear protective gear to prevent injury from dust and debris.
- Use a dehumidifier to speed up the drying process, especially in humid environments.
- If the damage is extensive or you're unsure about the source of the leak, consider hiring a professional to avoid further damage or safety risks.
- Avoid using too much joint compound, as it can be difficult to sand down and may create a bulge in the wall.


