Fix a Damaged Casing of a Gaming Controller
Description of Issue:
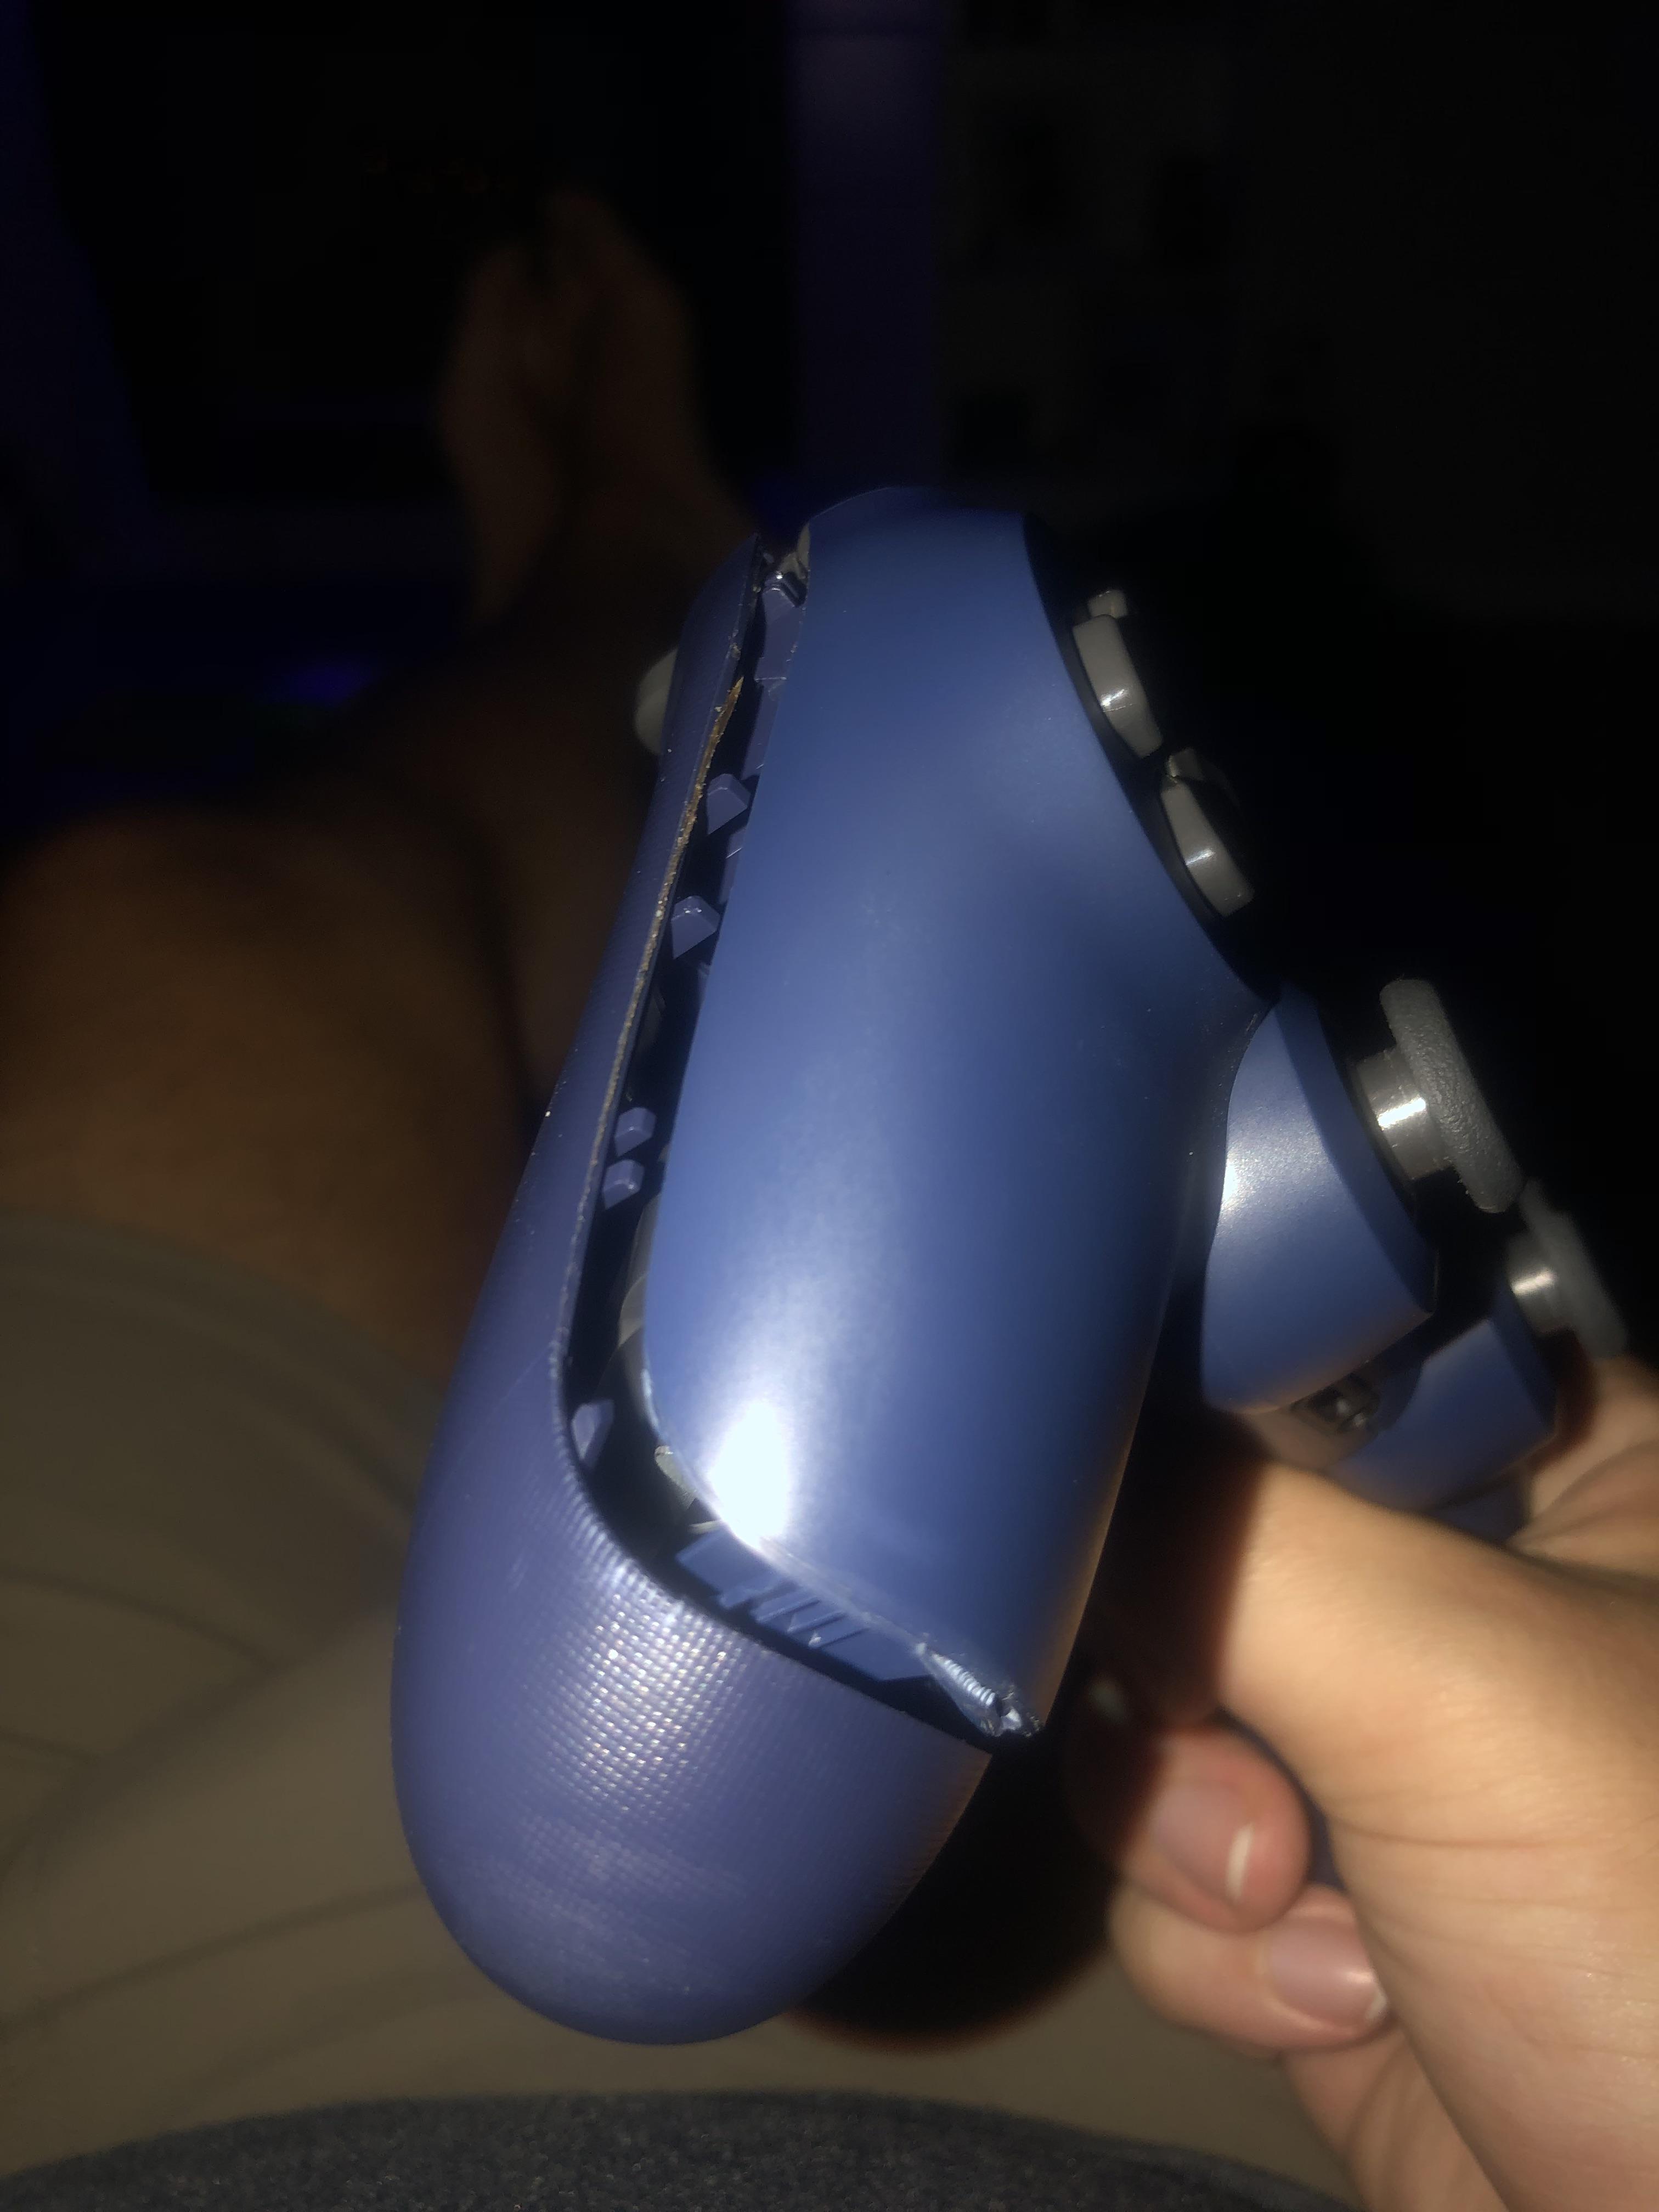
The provided image shows a gaming controller with a separated or damaged casing, specifically around the seam or joint. The user describes the issue as follows:
"I have anger management issues. I understand in hindsight that throwing it at the ground wasn’t the best idea but I’m past that at this point thanks for letting me know.
The controller is still playable but I want to close this gap and I need instruction before I completely lose my mind.
How can I fix this gap?"
The likely cause of the damage is accidental impact, in this case, throwing the controller.
Fixing this gap is important to prevent further damage, maintain the controller's functionality, and improve its overall appearance. This DIY repair guide will walk you through a cost-effective and beginner-friendly solution.
Overview:
This guide will help you repair the damaged casing of your gaming controller using simple, low-cost methods.
- Repair Process: Filling and bonding the separated casing parts.
- Estimated Time: 30–60 minutes.
- Skill Level: Beginner, no prior repair experience needed.
- Prerequisites: A clean workspace, basic household items, and a well-lit area.
- Expected Outcome: A restored controller with a minimized visible gap.
- Safety Precautions: Wear gloves when handling adhesives.
Tools and Materials Required:
- Super Glue (cyanoacrylate): $1–$3 at dollar stores or pharmacy
- Plastic filler or epoxy putty: $2–$5 at hardware stores
- Sandpaper (fine-grit): $1–$2
- Paint (optional, matching the controller's color): $1–$3
- A dry cloth
Step-by-Step Repair Guide:
- Clean the Area: Use a dry cloth to wipe away any dirt or debris from the gap.
- Prepare the Surfaces: Ensure both sides of the gap are clean and dry.
- Apply Super Glue: Carefully apply Super Glue to one side of the gap and press the parts together. Hold for a few seconds.
- Reinforce with Plastic Filler or Epoxy Putty: If the gap is still noticeable, apply plastic filler or epoxy putty to fill it.
- Sand the Area: Once dry, use fine-grit sandpaper to smooth out the area.
- Paint (Optional): If necessary, paint the area to match the controller's color.
Estimated Cost:
- Materials: $5–$10
- Total Estimated Cost: $5–$10
Tips and Warnings:
- Test household items on a hidden area to avoid discoloration.
- Ensure the area is completely dry before handling the controller.
- Avoid using excessive force, which can cause further damage.
Additional Engagement Elements:
FAQ:
Q: Can I use this method on other damaged parts of the controller?
A: This method is specifically for casing repairs. For other issues, consult a specialized guide.
Q: What if I don’t have Super Glue?
A: You can use epoxy or hot glue as an alternative.
Q: Is this repair permanent?
A: The repair should be durable, but it may not be as strong as the original casing.
This guide provides a cost-effective and beginner-friendly solution to fix the damaged casing of your gaming controller. By following these steps, you can achieve a professional-quality result while saving money.


