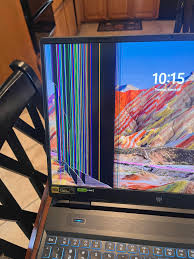
Fix a Cracked Screen of a Laptop
Overview:
This repair entails replacing the damaged laptop screen with a new one. The estimated time required to complete the repair is about 30-60 minutes. The skill level needed is intermediate, requiring some technical knowledge and care when handling electronic components. Prerequisites include a clean workspace, a dry environment, and prior knowledge of basic electronics and disassembly procedures. The expected outcome is a fully functional laptop with a new, intact screen. Before starting, ensure you have proper safety precautions in place, such as anti-static wrist straps or mats, and handle components with care to prevent further damage or injury.
Tools Required:
- Phillips screwdriver (usually #000 or #00)
- Plastic spudger or similar tool for prying open the laptop bezel
- New laptop screen compatible with your laptop model
- Optional: Anti-static wrist strap or mat
Step-by-Step Repair Guide:
- Prepare Your Workspace: Ensure your workspace is clean, well-lit, and free from static. Use an anti-static wrist strap or mat to prevent damage to the laptop's internal components.
- Remove the Battery: Completely power down your laptop and remove the battery to prevent any accidental power-ons or electrical shocks.
- Disassemble the Bezel: Use a plastic spudger to gently pry open the laptop bezel (the plastic frame around the screen). Start from one corner and work your way around. Be careful not to crack or break the bezel.
- Locate and Remove Screws: Once the bezel is removed, locate the screws holding the screen in place. These are usually found on the sides or bottom of the screen. Use a Phillips screwdriver to remove them.
- Carefully Remove the Screen: Gently lift the screen out of its housing. It may still be connected by cables. Take note of how the screen is positioned and connected before proceeding.
- Disconnect Screen Cables: Carefully disconnect the video cables (usually a thin, flat cable) from the back of the screen. You might need to use a bit of force but be gentle to avoid damaging the connectors.
- Remove Adhesive Strips or Tape: If your screen is secured with adhesive strips or tape, carefully remove them.
- Install the New Screen: Connect the video cables to the new screen, ensuring they are securely attached. Position the new screen in its housing, ensuring it's properly seated.
- Reassemble: Reattach any screws, adhesive strips, or tape to secure the new screen. Make sure everything is tightly secured but avoid overtightening.
- Reattach the Bezel: Carefully snap the bezel back into place, ensuring it clicks securely around the screen.
- Reinsert the Battery and Test: Reinsert the battery, turn on the laptop, and test the new screen to ensure it's functioning properly.
Estimated Cost:
- Cost of replacement parts (new screen): $100-$300, depending on the laptop model and screen quality.
- Cost of tools: $10-$20 for a Phillips screwdriver and plastic spudger. Anti-static equipment can range from $5-$20.
- Approximate labor cost if hiring a professional: $100-$200, depending on the technician's rates and the complexity of the repair.
Tips and Warnings:
- Handle with Care: Always handle electronic components with care to prevent static damage or physical harm.
- Match the Screen: Ensure the replacement screen is compatible with your laptop model to avoid issues with resolution, size, or connectivity.
- Avoid Overtightening: When reassembling, avoid overtightening screws as this can damage the screen or the laptop's frame.
- Seek Professional Help: If you're unsure about any step of the process, consider seeking help from a professional to avoid further damage or injury.


