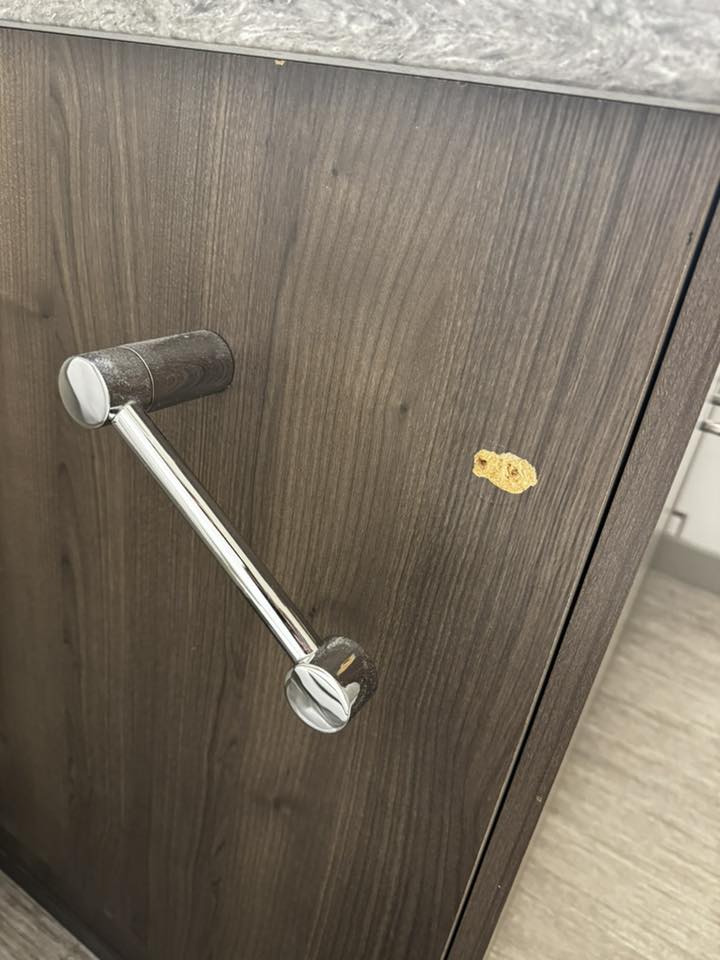
Fix a Broken Tissue Holder Arm of a Bathroom Tissue Holder
Overview:
- Repair Summary: This repair entails reattaching the broken piece of the tissue holder arm to the wooden base.
- Estimated Time: The estimated time required to complete the repair is about 30 minutes to 1 hour.
- Skill Level: The skill level needed for this repair is intermediate, requiring basic DIY skills and patience.
- Prerequisites: Ensure you have a clean workspace, a dry environment, and prior knowledge of basic woodworking and adhesive application.
- Expected Outcome: The expected outcome is a fully functional bathroom tissue holder with the arm securely reattached to the wood.
- Safety Precautions: Before starting, ensure your workspace is well-lit and free from any hazards. Wear protective gloves to prevent injury from sharp edges or tools.
Tools Required:
- Wood adhesive (e.g., wood glue, epoxy)
- Clamps (bar clamps or C-clamps)
- Fine-grit sandpaper
- Paint or wood finish (optional, to match the wood grain)
- Drill (if new holes are needed)
- Screws or nails (if the original fasteners are damaged)
Step-by-Step Repair Guide:
- Assess and Clean the Area: Examine the broken piece and the area on the wood where it was attached. Clean both surfaces with a damp cloth to remove any dirt or old adhesive.
- Prepare the Surfaces: Use fine-grit sandpaper to lightly sand the surfaces of both the broken piece and the wood. This helps create a better bond with the adhesive.
- Apply Adhesive: Apply a generous amount of wood adhesive to one of the surfaces. If using epoxy, mix it according to the instructions before applying.
- Reattach the Piece: Carefully place the broken piece back onto the wood, ensuring it aligns properly with the existing hole and any marks from the original attachment.
- Secure with Clamps: Use clamps to hold the piece firmly in place. If the piece has a screw or nail, ensure it's aligned properly before clamping.
- Allow to Dry: Let the adhesive dry for the recommended time, usually several hours or overnight.
- Reinforce if Necessary: If the piece seems loose after the adhesive has dried, consider drilling new holes and using screws or nails for additional support.
- Touch-up: If necessary, use paint or a wood finish to match the wood grain and cover any visible adhesive.
Estimated Cost:
- Replacement Parts: $5-$20 (depending on the type and quality of adhesive and any additional fasteners)
- Tools: $10-$50 (depending on whether you already have basic tools)
- Approximate Labor Cost: If hiring a professional, expect to pay $30-$75 per hour, with the total labor cost estimated at $15-$37.50.
Tips and Warnings:
- Tip: Apply adhesive in a well-ventilated area and follow the manufacturer's instructions for safety.
- Warning: Avoid over-tightening clamps or screws, as this can damage the wood or push the adhesive out of the joint.
- Tip: For a more durable fix, consider using both adhesive and mechanical fasteners (screws or nails).
- Warning: Ensure the area is completely dry before exposing it to bathroom conditions to prevent further damage.
This guide provides a comprehensive approach to fixing a broken tissue holder arm, ensuring it is securely reattached and functional. If you're unsure about any step, consider consulting a professional.