Fix a Broken Outlet on the Wall: A Budget-Friendly DIY Guide
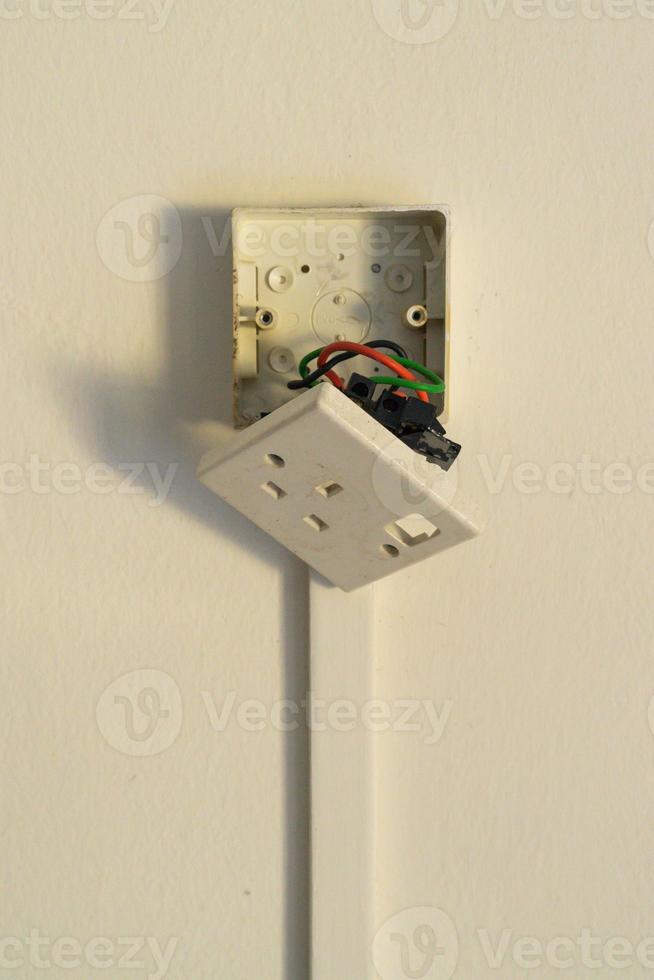
The image shows a broken outlet on the wall, with the outlet partially detached and wires exposed. The user's description is: "broken outlet on the wall". The likely cause of damage is wear and tear or accidental impact, but the exact cause is unspecified. It is essential to address this issue promptly, as a broken outlet can be a safety hazard and may lead to further electrical problems. This DIY repair guide will walk you through a simple and affordable solution to fix the broken outlet.
Overview:
This repair guide provides a step-by-step approach to fixing a broken outlet on the wall using common household tools and low-cost materials. The repair process should take approximately 15–30 minutes to complete, and no prior repair experience is needed. To begin, ensure you have a clean workspace and basic household items, such as a screwdriver and pliers. The expected outcome is a restored outlet that functions properly. General safety precautions include turning off the power to the outlet at the circuit breaker or fuse box before starting the repair.
Tools and Materials Required:
- Screwdriver (flathead or Phillips): $5 (can be borrowed or found in most households)
- Needle-nose pliers: $5 (can be borrowed or found in most households)
- Outlet replacement (if necessary): $5–$10 (available at hardware stores or home improvement centers)
- Electrical tape: $1–$2 (available at hardware stores or home improvement centers)
Step-by-Step Repair Guide:
- Turn off the power: Ensure the power to the outlet is turned off at the circuit breaker or fuse box. Verify the outlet is dead using a voltage tester.
- Remove the outlet cover plate: Take out the screws holding the outlet cover plate in place. Gently pull the plate away from the wall.
- Detach the outlet: Carefully pull the outlet away from the wall to access the wires.
- Identify and reconnect wires: Identify the wires (black, white, and copper) and reconnect them to the corresponding terminals on the outlet. Use needle-nose pliers to secure the wires.
- Replace the outlet (if necessary): If the outlet is damaged beyond repair, replace it with a new one. Ensure the new outlet is compatible with the existing wiring.
- Reassemble the outlet: Reattach the outlet to the wall and secure it with screws.
- Replace the outlet cover plate: Put the outlet cover plate back in place and secure it with screws.
- Turn on the power: Restore power to the outlet at the circuit breaker or fuse box.
Estimated Cost:
- Materials: $6–$12 (depending on the outlet replacement cost)
- Tools: $0 (assuming household items are used)
- Total estimated cost: $6–$12
Tips and Warnings:
- Always turn off the power to the outlet before starting the repair.
- Use electrical tape to secure wires and prevent electrical shocks.
- If you're not comfortable with this repair or if you're unsure about any step, consider consulting a licensed electrician.
- Regularly inspect your outlets for damage or wear and tear to prevent electrical hazards.
Additional Engagement Elements:
FAQ:
Q: Can I use this guide for a GFCI outlet?
A: Yes, the steps are similar, but ensure you purchase a GFCI outlet replacement.
Q: What if I'm not comfortable with electrical work?
A: Consider consulting a licensed electrician for safety.
Q: Can I use this guide for a outlet in a different location?
A: Yes, the steps are general and apply to most outlets.
Q: How do I prevent outlet damage in the future?
A: Regularly inspect outlets, avoid overloading, and replace worn-out outlets promptly.
By following this DIY guide, you can fix a broken outlet on the wall safely and affordably, ensuring your home's electrical system functions properly.


