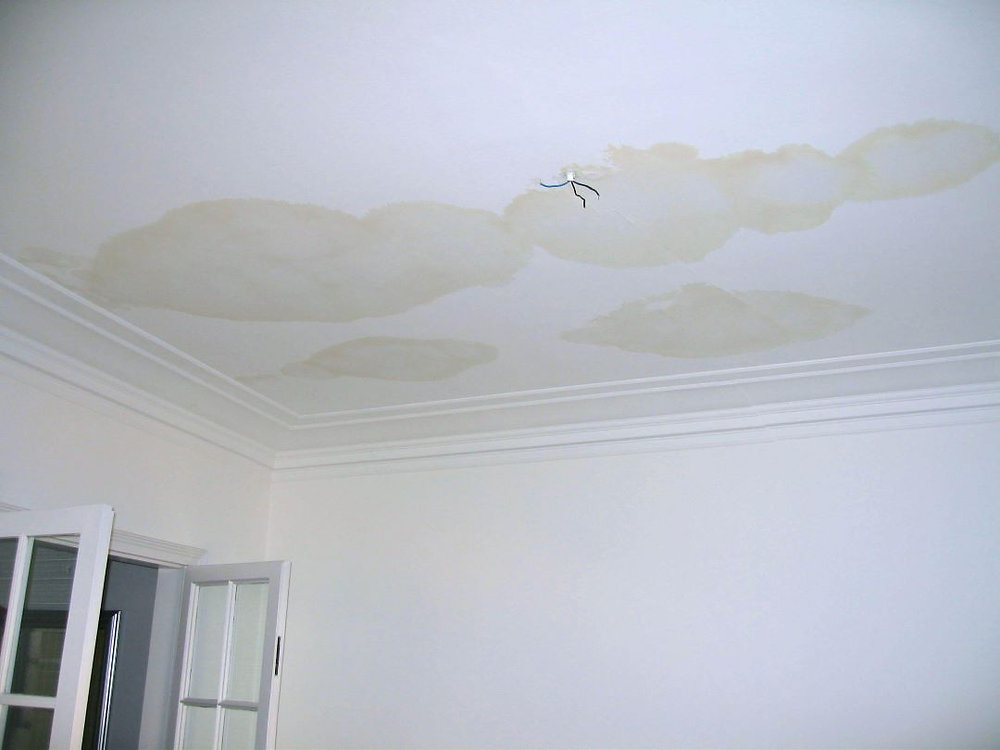
Fix a Water-Damaged Ceiling of a Room
The exact broken or need a repair thing in this image is a water-damaged ceiling of a room. This part appears to be damaged due to water leakage or roof leak, and needs immediate attention to restore full functionality.
Tools needed:
* Putty knife or joint knife
* Sandpaper ( medium-grit and fine-grit)
* Paintbrushes (various sizes)
* Paint roller and extension pole
* Ceiling repair compound (also known as spackling compound)
* Joint tape
* Mud pan
* Cleaning solution (soap and water)
* Ladder or step stool
* Drop cloths or tarps
Steps by step detailed guide to Fix it:
- Identify and fix the source of the leak: Before starting the repair, make sure to identify and fix the source of the leak to prevent further damage.
- Clean the area: Use a cleaning solution (soap and water) to clean the damaged area, removing any dirt, grime, or mildew.
- Allow the area to dry: Let the area dry completely, which may take several hours or overnight, depending on the extent of the damage.
- Scrape off loose material: Use a putty knife or joint knife to scrape off any loose or damaged material from the ceiling.
- Apply ceiling repair compound: Use a putty knife to apply a thin layer of ceiling repair compound to the damaged area, spreading it smoothly and evenly.
- Allow the compound to dry: Let the compound dry completely, according to the manufacturer's instructions.
- Sand the area: Use a medium-grit sandpaper to sand the area, feathering it out towards the edges so that it blends with the surrounding ceiling.
- Apply additional coats: If necessary, apply additional coats of ceiling repair compound, allowing each coat to dry before sanding.
- Sand again: Once the final coat is dry, use a fine-grit sandpaper to sand the area again, feathering it out towards the edges.
- Paint the ceiling: Use a paintbrush or roller to paint the ceiling, matching the surrounding area as closely as possible.
Tips and Warnings:
* Work safely: When working on a ladder or step stool, make sure to maintain three points of contact (two hands and one foot, or two feet and one hand).
* Use protective gear: Wear protective gear, including gloves, safety glasses, and a dust mask, when working with ceiling repair compound and sandpaper.
* Check for mold: If you notice any signs of mold or mildew, take steps to remediate the area before proceeding with the repair.
* Match the texture: If your ceiling has a textured finish, you may need to use a specialized texture sprayer or consult a professional to match the texture.
* Consider seeking professional help: If the damage is extensive or you're not comfortable with the repair, consider seeking the help of a professional contractor or handyman.


