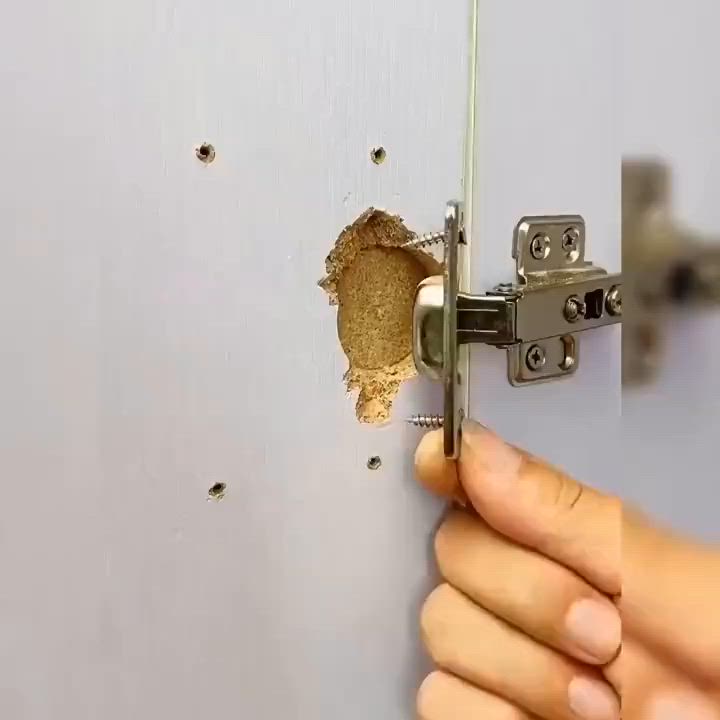
Fix a Stripped Screw Hole of a Cabinet
The exact broken or need a repair thing in this image is a stripped screw hole of a cabinet. This part appears to be damaged due to over-tightening or wear and tear, and needs immediate attention to restore full functionality.
Tools needed:
* Wood filler or epoxy
* Screwdriver
* Drill (optional)
* New screws
* Clamps (optional)
Step-by-Step Detailed Guide to Fix it:
- Assess the damage: Examine the stripped screw hole and determine the extent of the damage. If the hole is completely stripped, you may need to use a more extensive repair method.
- Clean the area: Remove any debris or dust from the stripped screw hole using a soft brush or cloth.
- Apply wood filler or epoxy: Fill the stripped screw hole with wood filler or epoxy. Make sure to follow the manufacturer's instructions for application and drying times.
- Allow to dry: Let the wood filler or epoxy dry completely, according to the manufacturer's instructions. This may take anywhere from a few minutes to several hours.
- Drill a new pilot hole: If necessary, use a drill to create a new pilot hole for the screw. Make sure the hole is centered and the correct size for the screw.
- Insert a screw anchor (optional): If the screw hole is severely stripped, you may need to insert a screw anchor to provide a secure base for the screw.
- Reattach the hinge: Place the hinge back onto the cabinet and screw it into place using new screws. Make sure they are securely tightened.
Tips and Warnings:
* Use the correct screw size: Make sure to use screws that are the correct size for the hinge and cabinet material.
* Avoid over-tightening: Be careful not to over-tighten the screws, as this can cause further damage to the cabinet material.
* Test the hinge: After reattaching the hinge, test it to ensure it is securely attached and functioning properly.
* Consider professional help: If you are not comfortable with this repair or if the damage is extensive, consider seeking the help of a professional.


