Fix a Cloudy Headlight Lens of a Car
The exact broken or need a repair thing in this image is a cloudy headlight lens of a car. This part appears to be damaged due to oxidation and wear from exposure to the elements, and needs immediate attention to restore full functionality.
Tools needed:
* A headlight restoration kit (available at most auto parts stores)
* A spray bottle of water
* A soft, lint-free cloth
* A UV-resistant sealant (optional)
Step-by-Step Detailed Guide to Fix it:
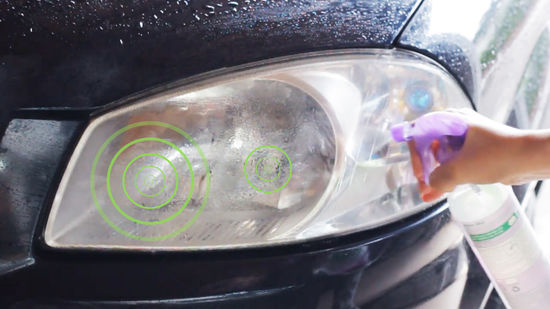
- Clean the headlight lens: Start by cleaning the headlight lens with a soft, lint-free cloth and a spray bottle of water to remove any dirt or debris.
- Assess the damage: Inspect the headlight lens to determine the extent of the damage. If the damage is minor, you may be able to fix it with a simple cleaning and restoration. If the damage is more severe, you may need to replace the headlight lens.
- Apply a headlight restoration solution: Use a headlight restoration kit to apply a solution to the cloudy areas of the lens. Follow the instructions on the kit carefully.
- Scrub the lens: Use a soft, lint-free cloth to scrub the lens in a circular motion, working from the center of the lens outwards.
- Rinse the lens: Use a spray bottle of water to rinse the lens thoroughly.
- Dry the lens: Use a soft, lint-free cloth to dry the lens.
- Apply a UV-resistant sealant (optional): If desired, apply a UV-resistant sealant to protect the lens from further damage.
Tips and Warnings:
* Avoid using harsh chemicals or abrasive materials, as they can damage the headlight lens.
* Use a soft, lint-free cloth to avoid scratching the lens.
* Work in a well-ventilated area to avoid inhaling fumes from the restoration solution.
* Test the headlight after completing the repair to ensure it is functioning properly.
* Consider replacing the headlight lens if the damage is severe or if you are not comfortable attempting to repair it yourself.


